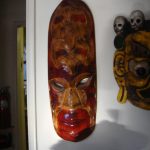
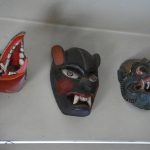
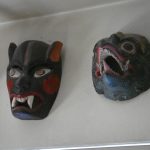
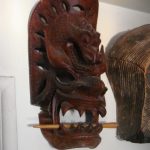
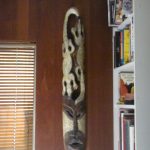
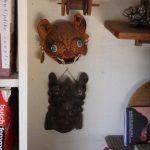
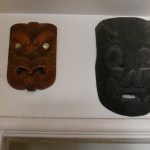
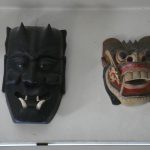
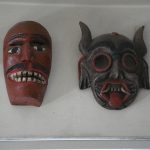
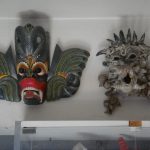
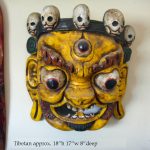
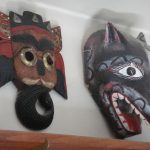
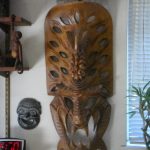
A Gallery of Masks

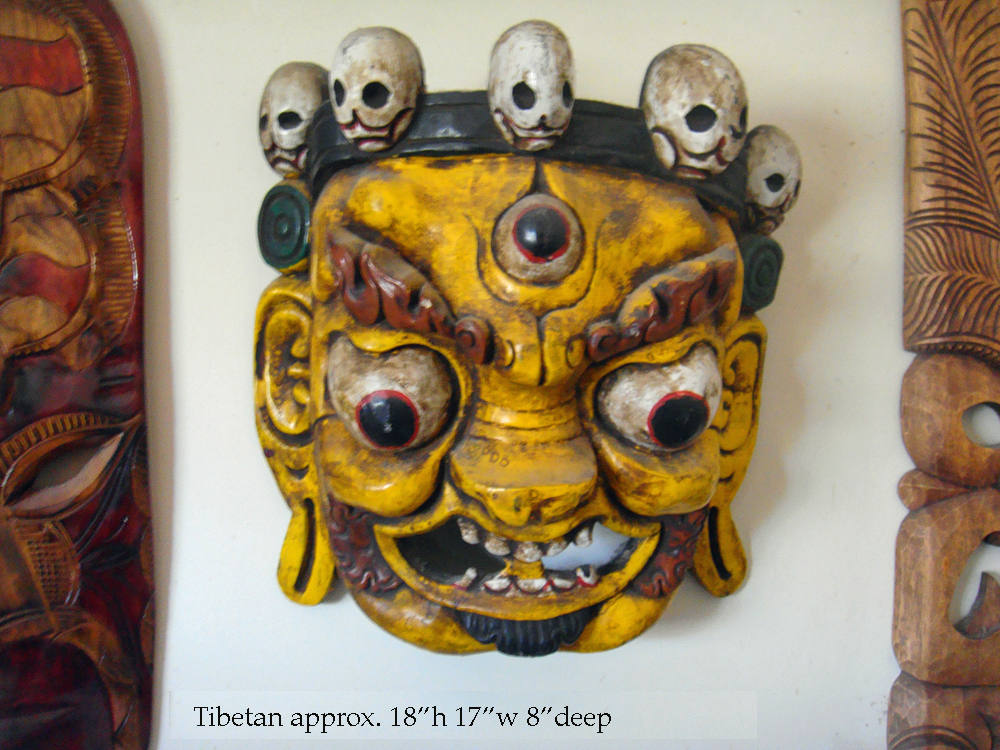
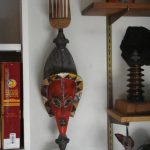
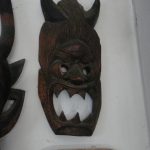
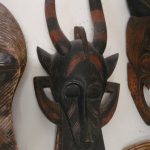
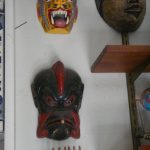
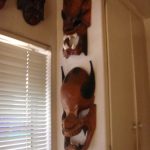
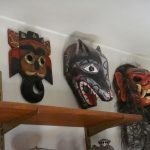
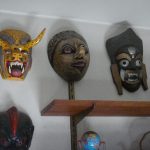
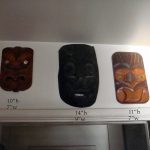
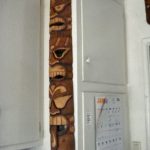
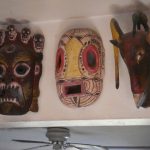
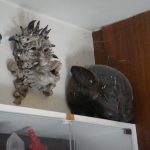
From the collection of Ronald and Doris Smart, my parents.

Many of them come from the Pacific Islands, my parent’s favorite place to be on earth. One– the spikey distorted thing seen in two pictures– came from the 1970’s Renaissance Faire (I think) and the rest probably came from swap meets and yard sales. They range around the big Kitchen, keeping the cooks company. I think they look… hungry.

New concepts for Costume Horns

These are the largest wearable horns I’ve ever made, six and seven inches tall! They are experimental– I’m trying to find the lightest possible way to craft them, and there’s a balance between lightweight and sturdy. So these may crack suddenly on the wearer… I hope not, because I couldn’t stop myself from decorating and finishing them! In any case, the materials that I’ve used will mend securely with Super Glue.

(EDIT) I have made a few pairs, and they are available for sale on my storenvy store;

Big big masks in progress

This pair of behmoths will become a genial devil and an ecstatic angel. We have three weeks to make it so, and zero budget.

Materials so far:

  • One large heavy-duty cardboard box with Styrofoam packing shapes still inside.
  • two long lightwieght cardboard boxes
  • A couple of amazon cardboard book wrappers
  • A couple weeks worth of newspaper ads.

We took out zero budget to Home Depot and overran it by a few hundred percent buying a single roll of packing tape and a couple box cutters.

Guys, this was one of those days when all of your years of experience and your analytical skills AND your hand-eye coordination– all come together in a perfect symphony, yanno what I mean?

I looked at this miserable handful of garbage, and I saw how to cut the big box to make the largest triangles possible, I saw how to cut the long boxes into wide strips, how to bow them across the shape to create the brows, cheekbones, jaw and chins of two very distinct characters. And, we did.

We cut the styrofoam into struts, and balled up newspaper to stuff under and hold the shapes.

a complicated cosmetics case for clown cosplay

I recently started thinking about playing a ferocious clown, and yes, I admit it– I was inspired by the lanky adolescent stoner juggalo troll from Homestuck. Gamzee Makara’s character is about as far away from mine as it’s possible to get, probably why I am so enamored of him!

I picked up this inexpensive but gets-good-reviews makeup; Snazaroo.

Gamzee only uses white and black, but the stuff can be found in inexpensive three-packs, and his other color is indigo purple. And red is always handy. I picked out a three pack of white, black, and purple, and another of white, black, and red, which doubled my amounts of my base colors very handily.

While I was browsing the color choices I noticed a metallics three-pack– gold, silver, copper, and Damn but I love metallics! So I bought them too while I was at it.

The threepacks come in these slippery little clam packs. A pain in the butt, and I like a bit of ceremony, so I started thinking about something cheap and easy (hehe) to keep them in. Since my original inspiration is such a cool dude, I wanted something that suited him, even if I end up using my clown makeup for other things more often than not.

I found this little book, and decided to turn it into a cosmetics box. It turned out to already be Gamzee’s color, once I pulled the dustcover off– and the dog bones are rather fitting!

I cut all of my little makeup patties apart and played with arrangements. I decided that I could create a long trough for brushes and some of those flat makeup sponges. I drew in eight holes, because another color I like to use is blue, and I intend to pick some up later.

Did I say “easy?” Hahaha I was just joking!


The tools and materials you need to make something like this:

  • Pencil,
  • Xacto or other sharp blade (with lots of replacements, or a fine sharpening stone, because paper really dulls those blades fast)
  • PVC glue,
  • Water to dilute the glue,
  • Brush for the glue,

And intestinal fortitude because the people you live with will be inclined to roll their eyes– even though you thought they knew better by now…

First, I needed to glue my pages together. This is so much easier than you’d think: I simply brushed some diluted glue along the edges.The percentage of dilute isn’t very crucial. You want something like 30% to 50% water. I just dipped my brush into the glue and swished it around in a few drops of water each time I needed to perfom this operation.

I did a couple of things first; I separated three or four pages off the top, and I wrapped them and the cover and the bottom endpapers in cling wrap. The covers will get brutalised, but not just yet. We pick and chose because we can!

I set the book under some weight to dry, which took about ten minutes.

Then I started cutting.

This case has a lot of compartments, and all of them need to be stabilised individually. I decided to start with my long center compartment. Each piece of paper lifts out as you cut, leaving you in this blizzard of paper scraps.

The cutting part took two sessions over two days.

A lot of this was me experimenting with the best and most controllable ways to carve down into the strata. Cutting curved lines takes more control than straight ones, where you could use a ruler– but Gamzee is SO not a straight-line dude. if he were making this, he would have cut his holes with a few casual claw swipes. So I did too, only it took me many more than a few claw swipes and none of them were casual.

It’s easier to find your corners if you drill little holes for your knife to find. Check out that beautiful old handcranked drill!

Once I had that first compartment cut out, I brushed the walls with the same diluted glue.

That meant I had lots more stability for all those small circles I was about to cut.

Needless to say, my planned eight circular compartments morphed into ten odd-shaped compartments. Because too much is never enough, and evidently that includes toil and trouble!

I cut them out a couple at a time, in an alternating pattern, doing the brushed glue routine as each one was completed so as to stabilise the one next to it for the next cutting. This was labor-intensive, and messy, and as an onlooker commented, “heartbreaking.” I have a slice on the ball of my thumb, and a very sore first joint on my first finger from pressing down so hard.

If I were going to do this again, I would cheat, totally– replace most of the pages with foam core, so I would have fewer layers to cut through. Also, remember that a fresh Xacto blade is your loving friend! Change your blades, don’t be stubborn. And wait for the glue to dry, or else you just tear your walls.

Afterall my cutting was done and the walls glued, I pulled down one of the top pages I had wrapped up and safe, and glued it over the top to cover the messy pencil lines and cuts where my knife slipped. Once that had dried, I cut the holes open again. Then I glued the pages to the bottom part of the book.

Four coats of water-based poly finish should make the whole thing plenty waterproof. it won’t prevent the makeup from smearing across the surface of the top page, but that’s okay.

I wanted to have room for a hella lot of white and black cake, since almost every face uses those. And it occurred to me that I use three other colors for whole face applications– Gold, Blue, Red. So I made two really large compartments, three large, and tucked in five smaller shapes, like eggs. two got filled with the silver and copper, one with that small amount of purple. Some time in the future, I’ll pick up the blue, probably along with more black and white, and then there are two small hollows for whatever else I need.

DSCI0067The cover is still in progress. The cover comes from atom2ashes’ depiction of Gamzee’s planet “Land of tents and mirth.” I altered it some — because Gamzee wouldn’t have a picture of himself on his own makeup case! I printed it at 300dpi but on regular paper, and it looks suitably distressed. I finished it with more poly– paint it on real fast,in a thin coat, and do not go over the wet finish because your ink might be too watersoluble and you’ll have to print it all over again.

I cut out the rest of the extra pages, to leave space for a thin plastic mirror.

A hand made computer bag

I began this about two months ago, got so frustrated that I put it aside– after, not before, I cannibalised parts of my commercial (and cut-rate) computer bag to make it. Last week though, I got serious again– i would say that I tore out and re-sewed every seam at least twice, and some of them many more than that.

But isn’t it a beaut! It has exactly the pockets I need. It’s weather-worn and stained on the outside, courtesy of the two old canvas rucksacks I found in the garage– both in very good condition– and then the inside is a little bit like going down the rabbit hole, with these watery greens and blues, and the elaborate patterns.

One line of pockets is made of the mesh from my old one, including the zipper. the others are made from mesh “non-slip” shelf liner from the dollar store. I tried to rip that stuff with all my strength, so I think we’re good on that.

Of course I now know a better way to put together a multi-compartmented bag, just because I DID IT WRONG on this one.

First mold for sculpted wing elements

For some reason, I did these little wings in plastalina, which really isn’t the best choice for detailed items under two inches in size. I just wanted to have that oily texture under my fingertips and the nostalgic scent, I guess. I got them as clean as I could, and cast them in plaster, as we see here. Plaster can take remarkable detail. Enlarge the image, and you will see threadlike areas which are simply rough clay that i couldn’t smooth (not without my fumbling fingers wrecking some other place) . Now I can do a little bit of finishing in the plaster, then push sculpy into it, pull the shaped sculpy out again– hopefully it won’t distort too much in the process– and bake and sand the sculpy to refine the elements. Whew, what a lot of work!


But the result will let me make clean molds for casting.


What am I going to do with these wings? I can think of a lot of things! They could become jewelry or applique elements– perhaps Kristi Smart could make some use of them. I need them for my next haberdashery project. It’s top secret– don’t tell anyone– but I plan to make epaulettes. 😉

A gallery of wordpress themes

I really like the wordpress CMS, and have watched it grow from a simplistic blogging system to the marvellously flexible multi-use publishing platform it is today.

I’ve been designing themes for WP for quite a while now. Here are a few of my newest. They all seem to have an ornate, collaged feeling, don’t they?

Book Binding for fun (not) profit

Little LedgerI doubt I will make these to sell. But what fun to make for myself! A few hours of fighting with the printed pages to get the order correct (well… that kind of took all day, really). A printer that can print both sides makes a HUGE difference.

I got my idea from my sister, Kristi Smart, who designed her dream worksheet for her custom clothing orders and– get this– made it pretty. What a concept! And besides being easy to look upon, the different parts of the project are visually separated.

I need something to take around with me that was not my laptop. Old fashioned, pen and paper. Pretty.

The first project book I made was pretty much exactly as described in this post at instructables.com. I was just in time for the Gifting Season, so I gave it to a friend. This is my second Project book, and I used this more elaborate instructable. I cheated– You know where she says that PVA glue is the only way to go? Well, I couldn’t find mine, or even my white glue, so I used Elmer’s brown-colored Ultimate Wood Glue *blushes*. And I folded strips of muslin for what she calls “head material,” which seems to be a kind of cotton ribbon. On the other hand, I learned that the little snips into the back of each signature, in preparation for sewing– makes the sewing so much easier. You don’t want to cut out any of the steps. And the snips don’t have to go very deep, either not even all the way through all of the pages in that fold.

If you simply follow along like it was a cooking recipe, binding a book properly is not nearly as hard as I thought it would be. Each step makes sense. Sewing the signatures is faster than stapling them, as the first instructable suggested. And the sewing creates that incomparable pattern at the fold. you KNOW you have a BOOK in your hands!

Go ahead– try your own. If you like my pages, let me know and I’ll gladly send you them as a PDF file. 🙂

For another way to bind books, this page shows the Japanese stitching technique. It’s extremely useful for repairing paperbacks.

For another slant on making your own book, check out Becket Gladney’s Coptic-bound sketch-filled personal notebook.

Pastry Chef jewelry model

Katherine is a pastry chef at the Firefly Bistro in South Pasadena.

Her favorite jewelry is simple bead strands– a rope of pearls will suffice. Big pearls, because she’s a big girl.

Her favorite recipe is for pecan cookies– she has it memorized.

And she likes to turn her pecan cookies into a pie crust for pumpkin pie.

Katherine has gifted me with lollipops made from fresh cherry juice, rose-flavored nougat, and ginger marshmallows.

And my jewelry adores her…

Back to Top